In this tutorial we will go over the process of transferring files over the network from one device to another. We will be using an application that I built in Rust that relies on the FTP protocol to send and receive files over the network, the sender/client can be any device (mobile phone,laptop,desktop) for the server we currently support Windows, Linux and MacOSX.
Here is some technical lingo you might not know and will come across in this tutorial:
- Rust – A programming language known for being fast, safe, and good for building secure applications.
- FTP (File Transfer Protocol) – A way to move files between computers over the internet, often used to upload websites.
- Sender/Client - The device sending the data
- Server - The device receiving the data
- Directory – Another word for a folder on your computer where you store files.
- Path – A way to tell the computer where a file or folder is located.
- Absolute path – The full location of a folder/file E.g,
C:\Users\YourUsername\Desktop\NewFolderC:\Users\YourUsername\Desktop\NewFile.txt
- Relative path – A location based on where you currently are.
- Absolute path – The full location of a folder/file E.g,
- IP Address
- Local - An address that exists only inside your home network and is between specific ranges, each machine has it’s unique address inside one of these ranges
- Public - The address that your devices use to connect to the internet, normally you have only 1 public ip address for all your devices, your router is in charge of internally resolving the requests to each machine’s private address
The application(RFTPS) is open source, feel free to look trough it’s code, submit any requests, or create/report a new issue
Getting the application
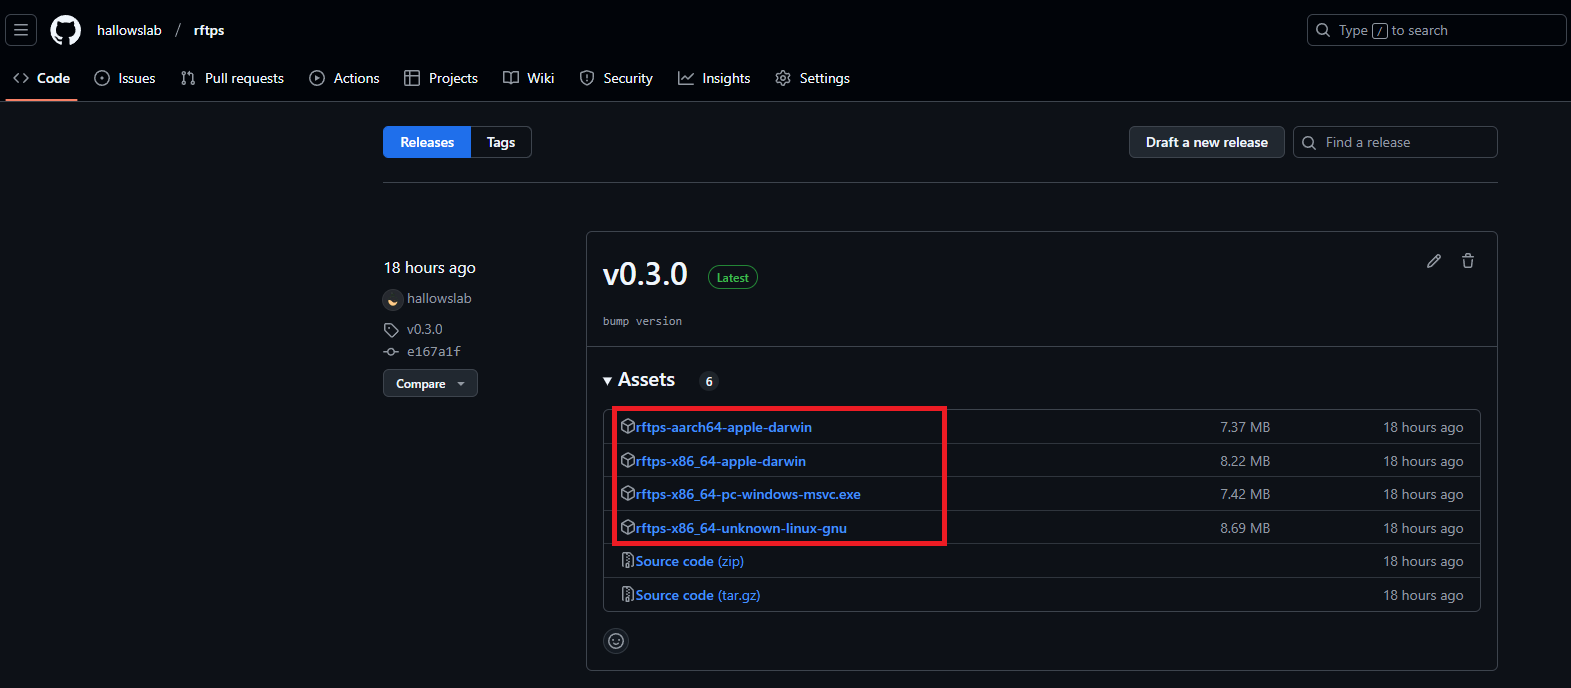
- Head over to https://github.com/hallowslab/rftps/releases
- At the top of the page you should have the latest version of
RFTPS - At the bottom of the release itself where it says “Assets” you will have multiple options to download, you will want the one that matches your system EX:
- Windows - rftps-x86_64-pc-windows-msvc.zip
- Linux - rftps-x86_64-unknown-linux-gnu.tar.gz
- Mac(Older Models) - rftps-x86_64-apple-darwin.tar.gz (untested, report any issues above)
- Mac (Newer models, M1&2 chips) - rftps-aarch64-apple-darwin.tar.gz (untested, report any issues above)
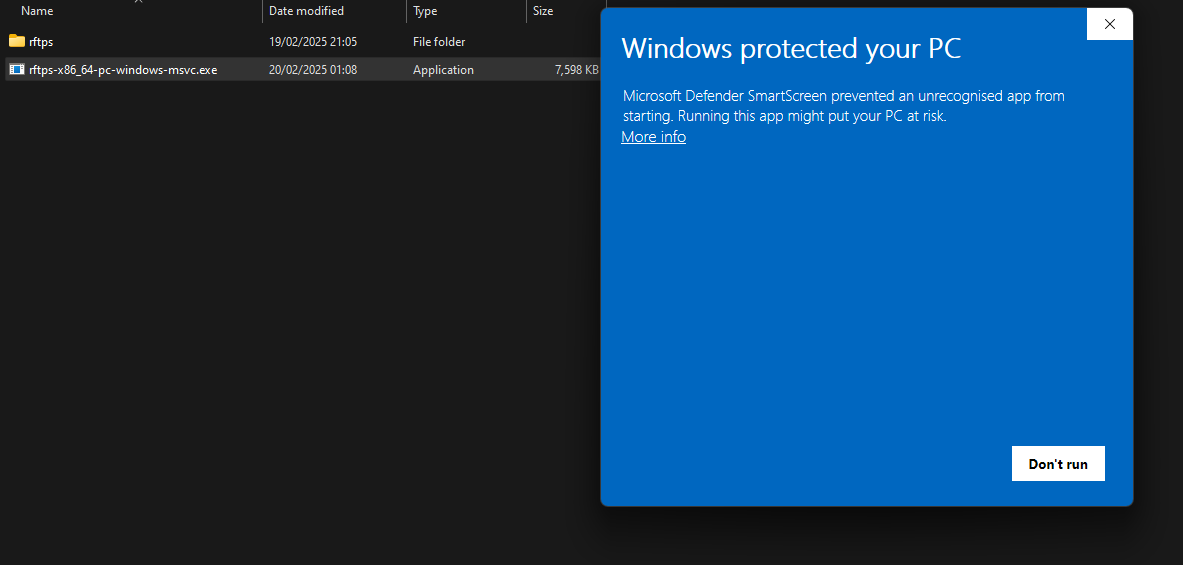
You might get a warning about an unrecognized app, since Windows does not know this app, and code signing licenses are expensive 🙃 It will dissapear with time if many users download the app
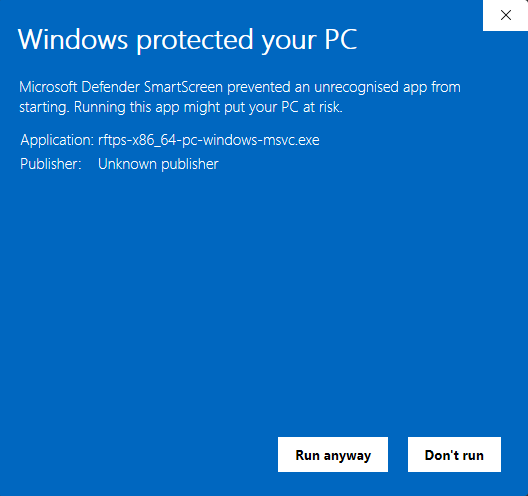
To get trough the warning click on “More info”
And then “Run anyway”
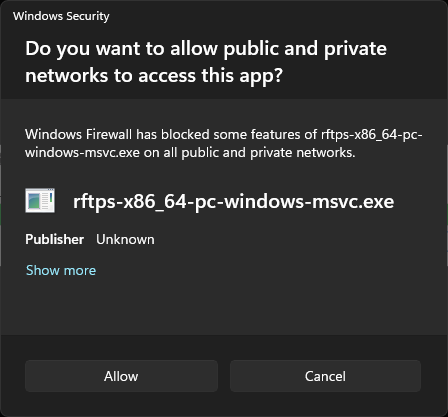
You will also need to allow the app network access, this is because we are transferring files over the network.
Windows
Setup
Auto configuration
- Extract the files from the zip archive, you will have an executable “rftps-x86_64-pc-windows-msvc.exe” and 2 certificate files cert.pem and key.pem (these are used to encrypt the data between client and server), the executable must always remain in the same place as the certificate files, if you move the executable move these 2 files also
- Move/Copy the executable “rftps-x86_64-pc-windows-msvc.exe” and the certificate files “cert.pem” and “key.pem” to a regular location like your desktop or an external drive (It can remain in the Downloads folder, however if you just execute the app as is, it will create a folder called rftps in your Downloads and that’s where the files you send will be received)
- If you don’t want to configure a username, password and location for the files just double-click
rftps-x86_64-pc-windows-msvc.exeand it will assume it’s defaults which are:- Username:
rftps - Password: It’s randomly generated everytime you execute
RFTPS - Directory:
./ftps - If you do want to configure these options continue following the steps
- Username:
You will need to keep the terminal window that appears open until you are finished transferring the files (that window is the RFTPS server). When you are finished you can just close the window and the program will stop executing, to run it again you can double-click it again
Manual configuration
The
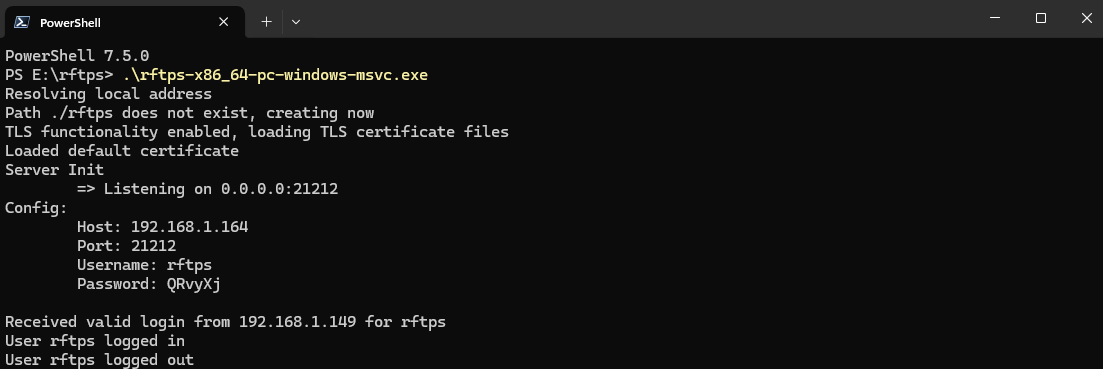
RFTPSexecutable allows for the user to configure the username and password for authentication along with some other parameters(more to come!):-a, --address: Address for the FTP server to receive communicattions, default is “rftps”-p, --port: Port that the FTP server listens on-d, --directory: This is the place the files will be sent to, the default isRFTPScreates a folder called “rftps” in the same directory as the executable-u, --username: Username for FTP authentication between client and server-P, --password: Password for the FTP user-f, --enable-ftps: Enables/disables FTPS (encryption between client and server), values can be true or false--cert-pem: The certificate file “cert.pem”--key-pem: The key for the certificate file “key.pem”
Manually executing
RFTPSto specify parameters:- On Windows 10 and above hold shift and right-click on the directory that the executable is, for example if it’s in Desktop hold shift and right-click your Desktop background and in the windows context menu you should see either “Open terminal here” or “Open Powershell Window here”, click on either one of those.
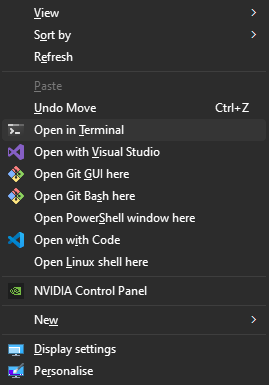
- The same applies to any folder, just navigate to it in Windows explorer and shift+right-click
- On Windows 10 and above hold shift and right-click on the directory that the executable is, for example if it’s in Desktop hold shift and right-click your Desktop background and in the windows context menu you should see either “Open terminal here” or “Open Powershell Window here”, click on either one of those.
You should now have a new “Terminal/Command/Powershell” window open
Start the
RFTPSexecutable specifying parameters:RFTPScan be called by it’s name and you can pass the parameter--helpto show it’s usage instructions:.\rftps-x86_64-pc-windows-msvc.exe --help(The .\ on Windows means that there is an executable in this path)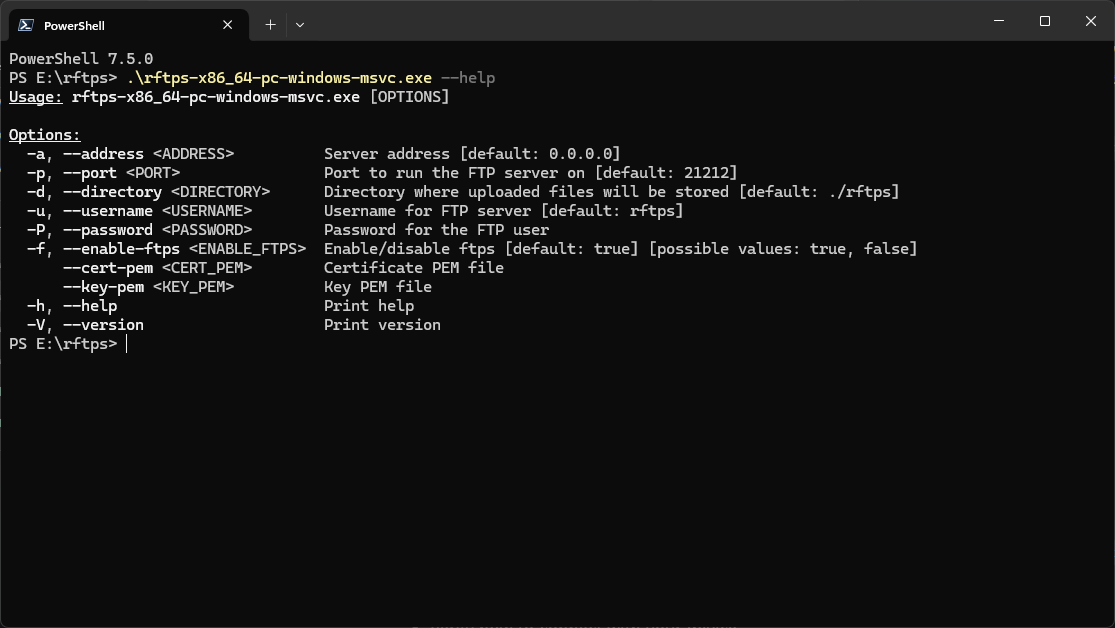
- Here we are specifying some parameters manually:
.\rftps-x86_64-pc-windows-msvc.exe --port 2123 -d "E:\NewFolder" -u hallowslab --password "9x3_?oJ+U/f-H#
Connecting client to server
In order to connect to the FTP server you will need to install an FTP client on the device that will be sending the files, some examples below.
Android:
IOS:
- Pending update
Windows:
- Microsoft FTP utility
- Filezilla
- Should support most linux clients trough WSL
Linux:
MacOS
Android
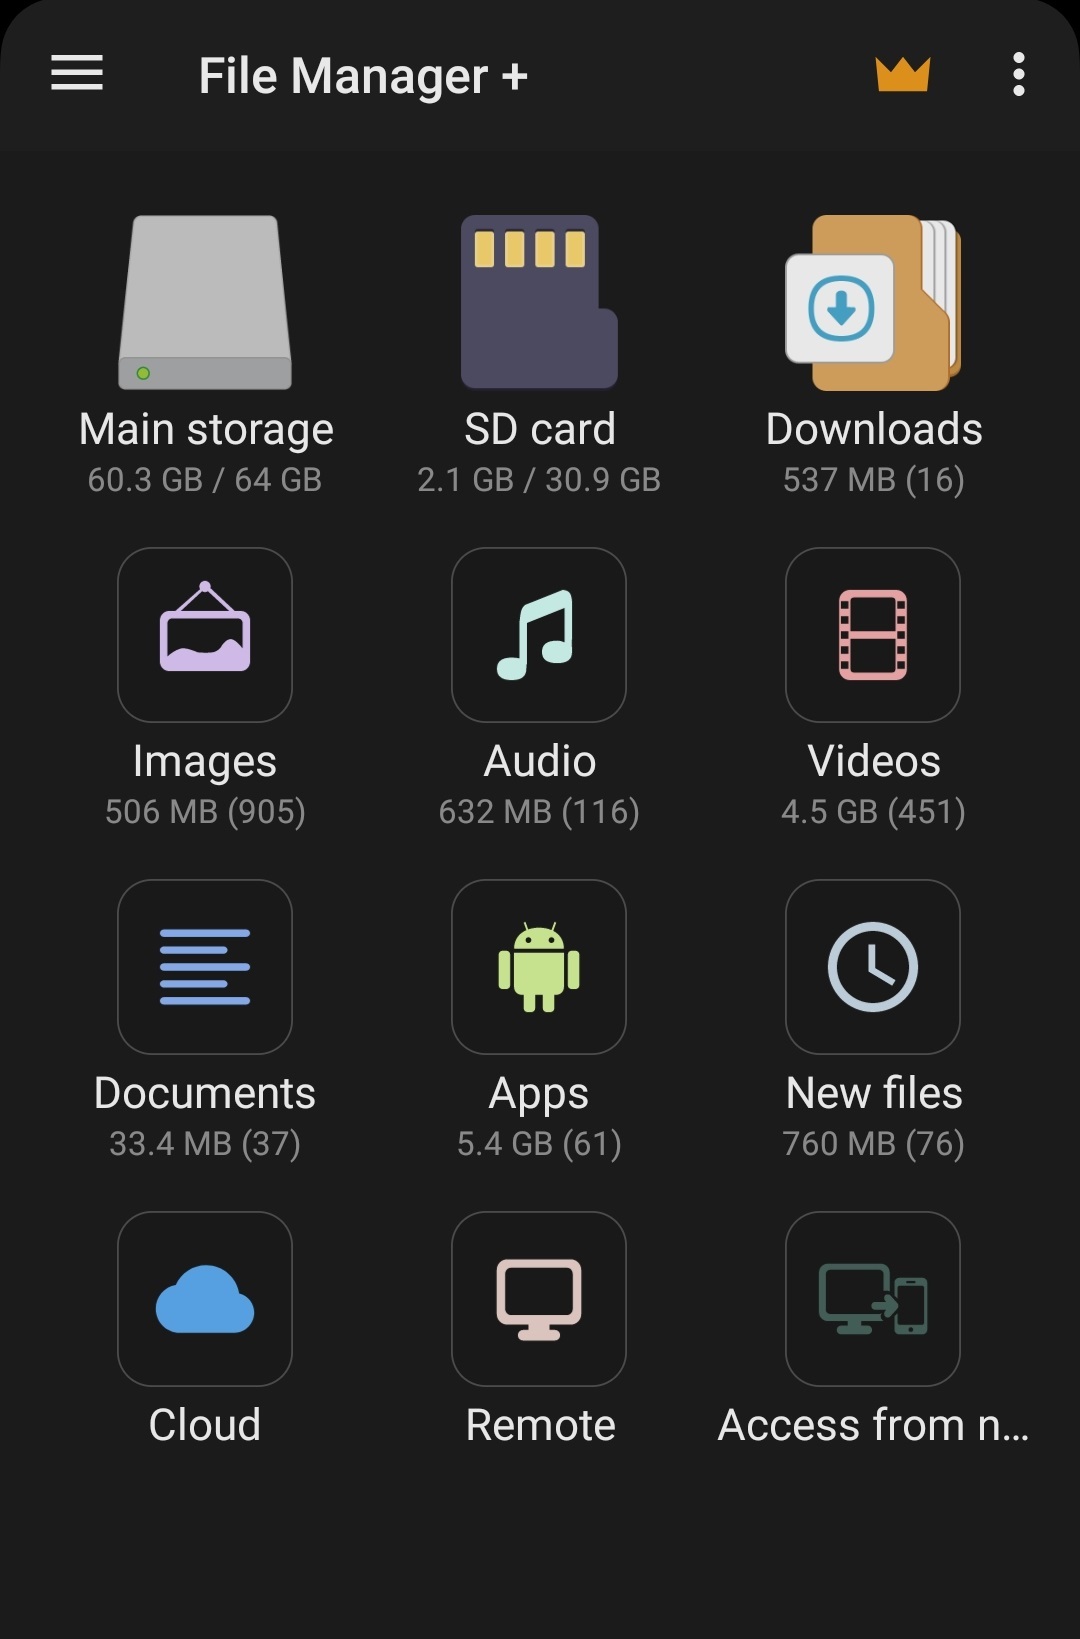
Filemanager+
For this we will be using File Manager + (Since it seems the most popular at this time, most Downloaded), however the process should be similar on other apps that support sending files over the FTP protocol, some examples are CX File Explorer, AndFTP and if you would like an open source alternative check the guide below Download the and install the app from Google’s play store
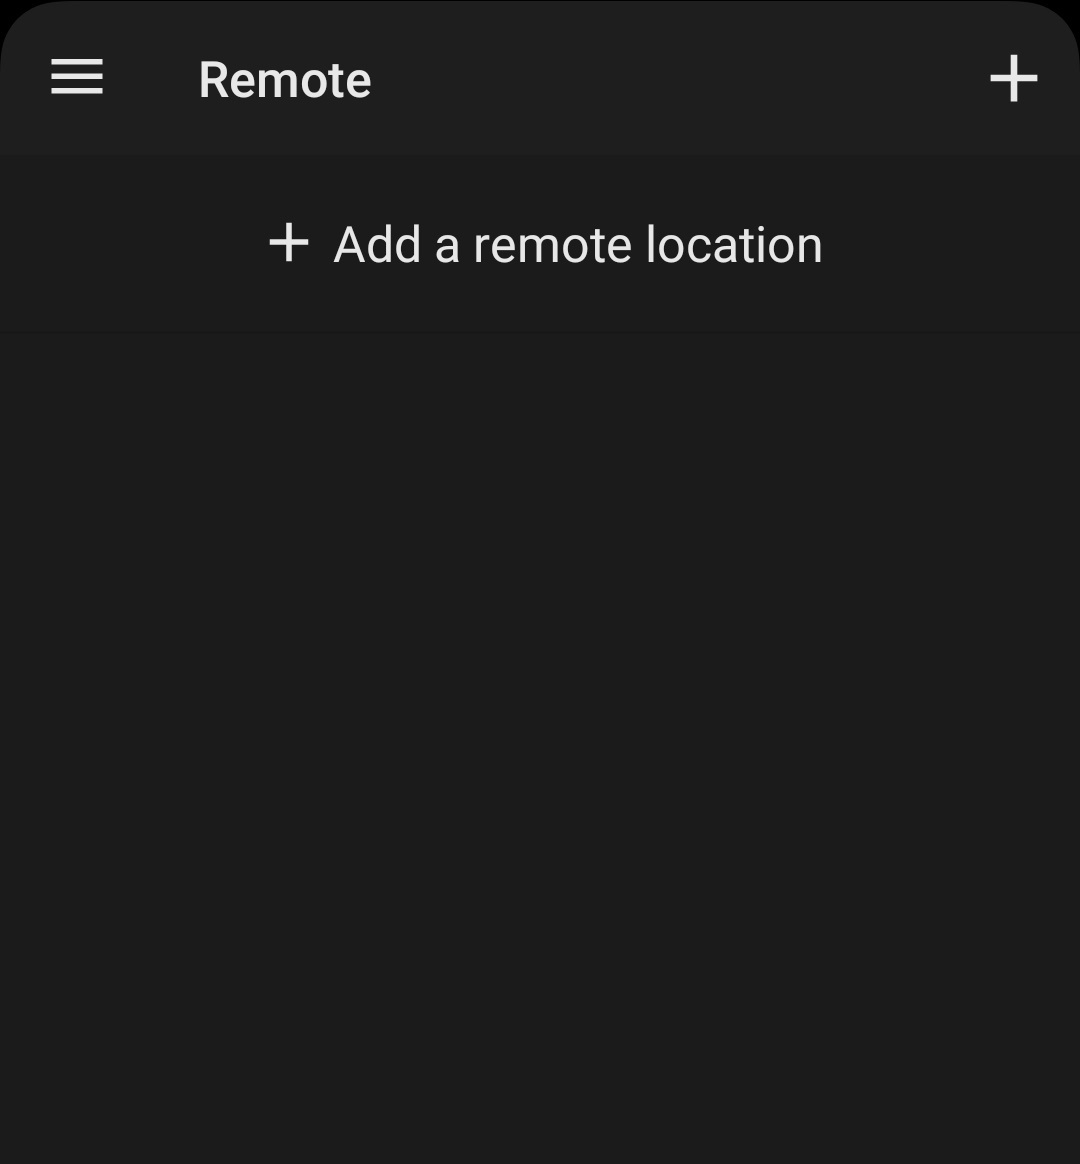
Now opening up the app will reveal it’s initial menu where you can access your local files, and also where you can connect to a remote FTP server, so tap where it says remote
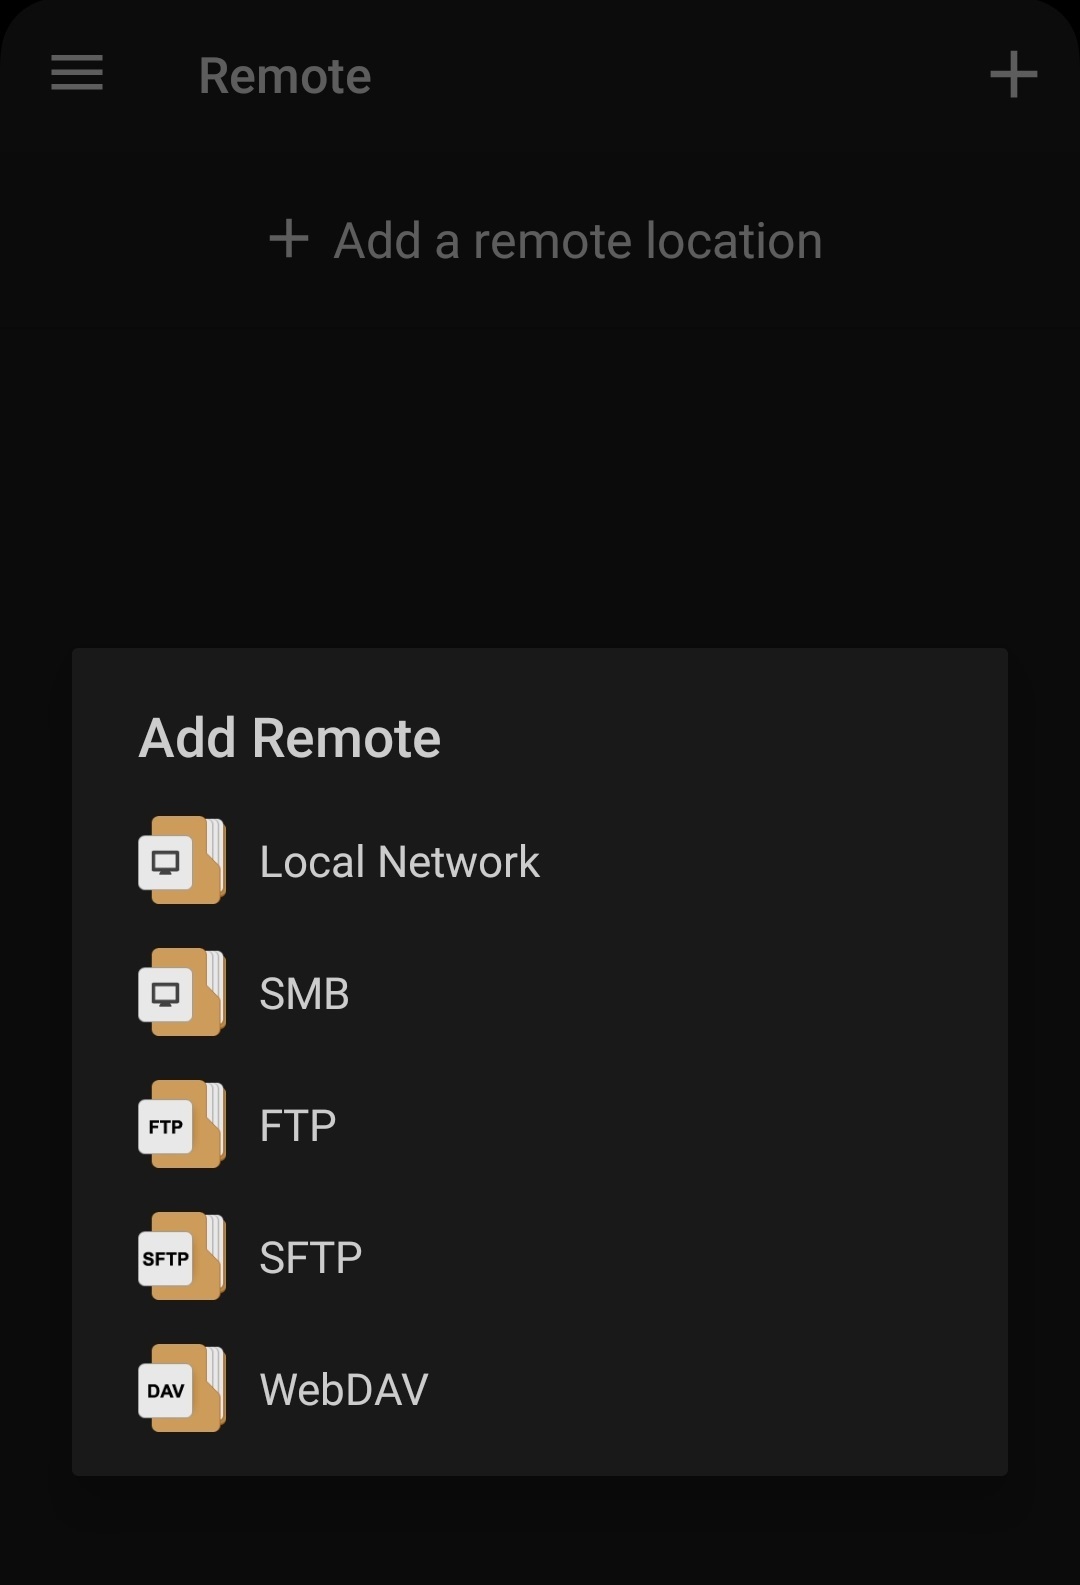
A new window should appear and there you can see your configured connections, however if you never used the app it should be empty displaying only a “+ Add a remote location”
It should ask you for one last question which is the type of connection, in our case we will be using the FTP protocol, so select FTP
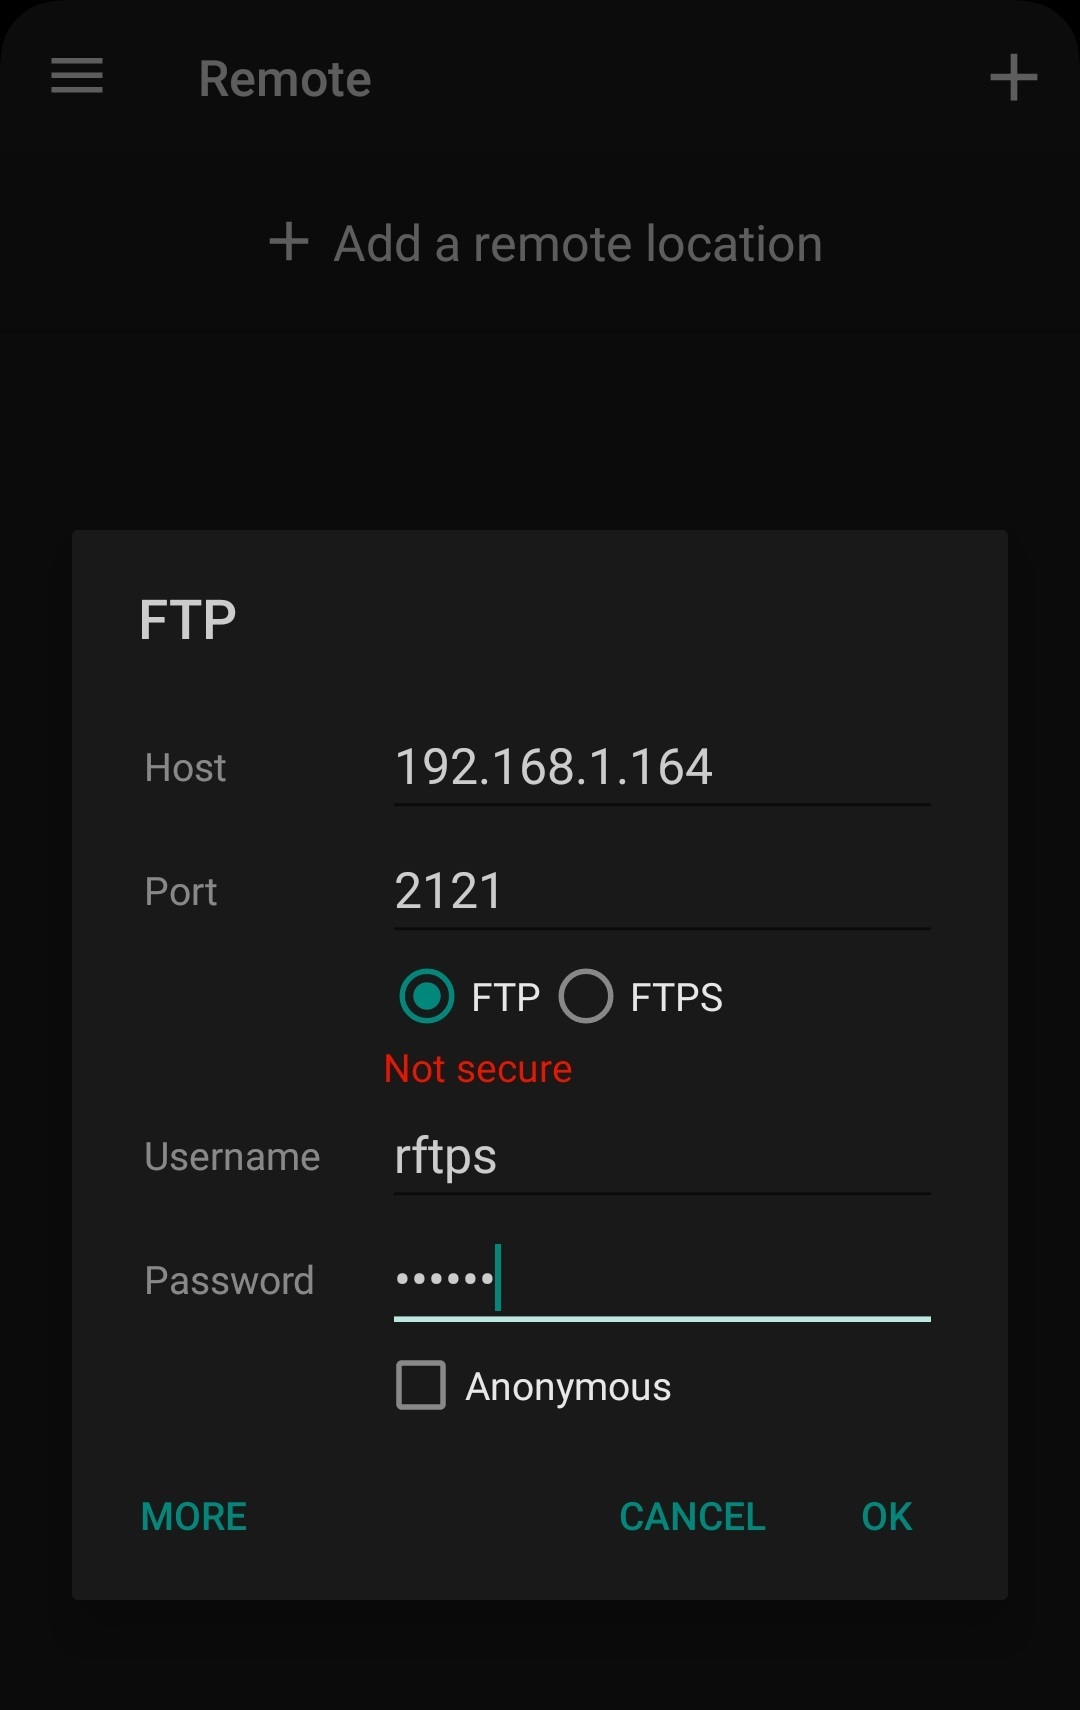
Here we will input the data
RFTPSdisplays, so:- Host: Host
- Port: Port
- Username: Username
- Password: Password
- FTP or FTPS: You should always prefer FTPS(It’s FTP with encryption), however if you experience any issues then switch to FTP
Android Open Source
Pending Update
IOS
I don’t own one, however I’ll still try to explain it here in a near future hopefully 👻
Windows & Linux
Filezilla
- I choose Filezilla because it is one of the most popular FTP clients and it has support for both Windows and Linux, you download it from their official site, you will want the client not the server(
RFTPSis acting as the server). - I will not go over the install since it’s a pretty standard application install, after the install you can execute filezilla and it should open it’s main window
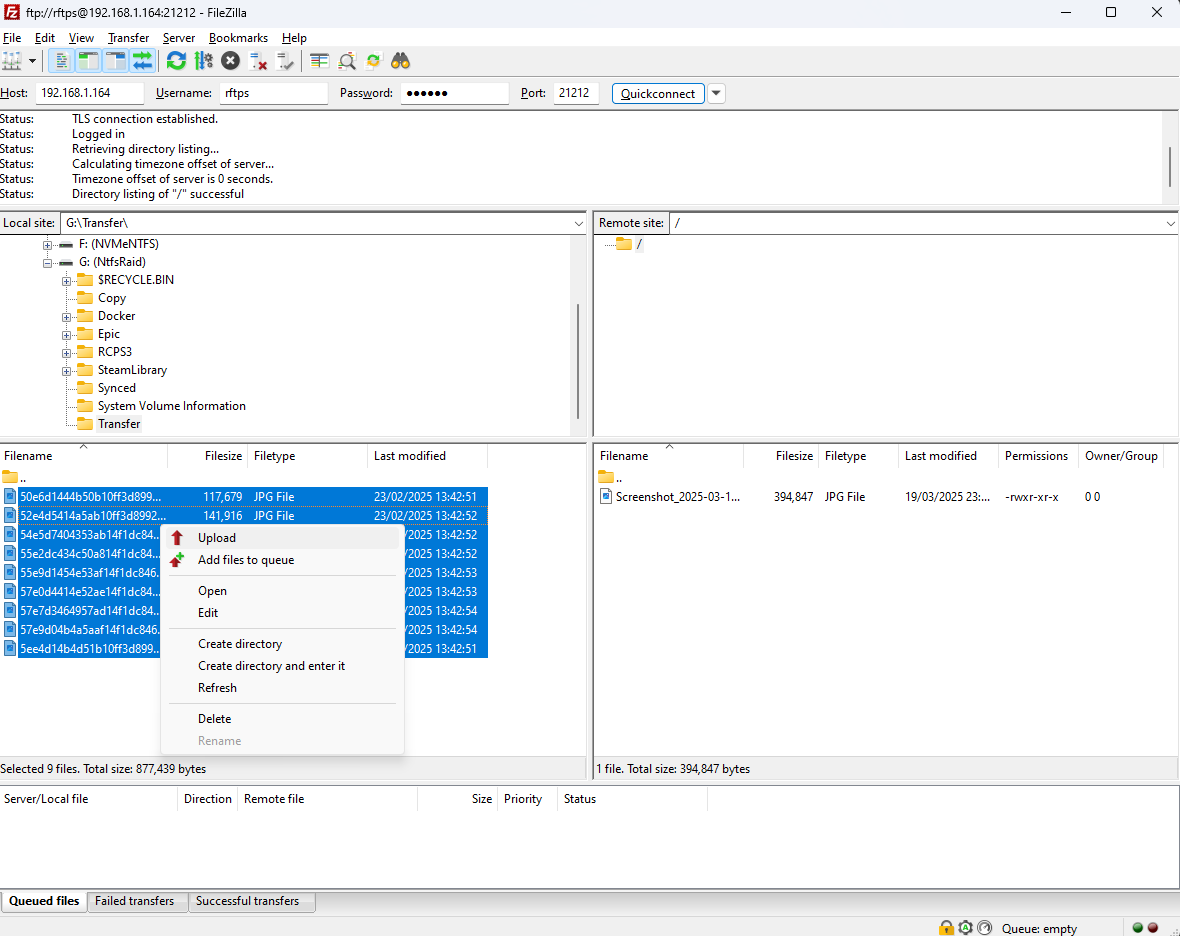
- The screen is split in the half, at the left is your computer and local files, the right will be the server, as you can see in the left side I’m in “G:\Transfer\” and there are some image files there, I will upload these to the server as an example
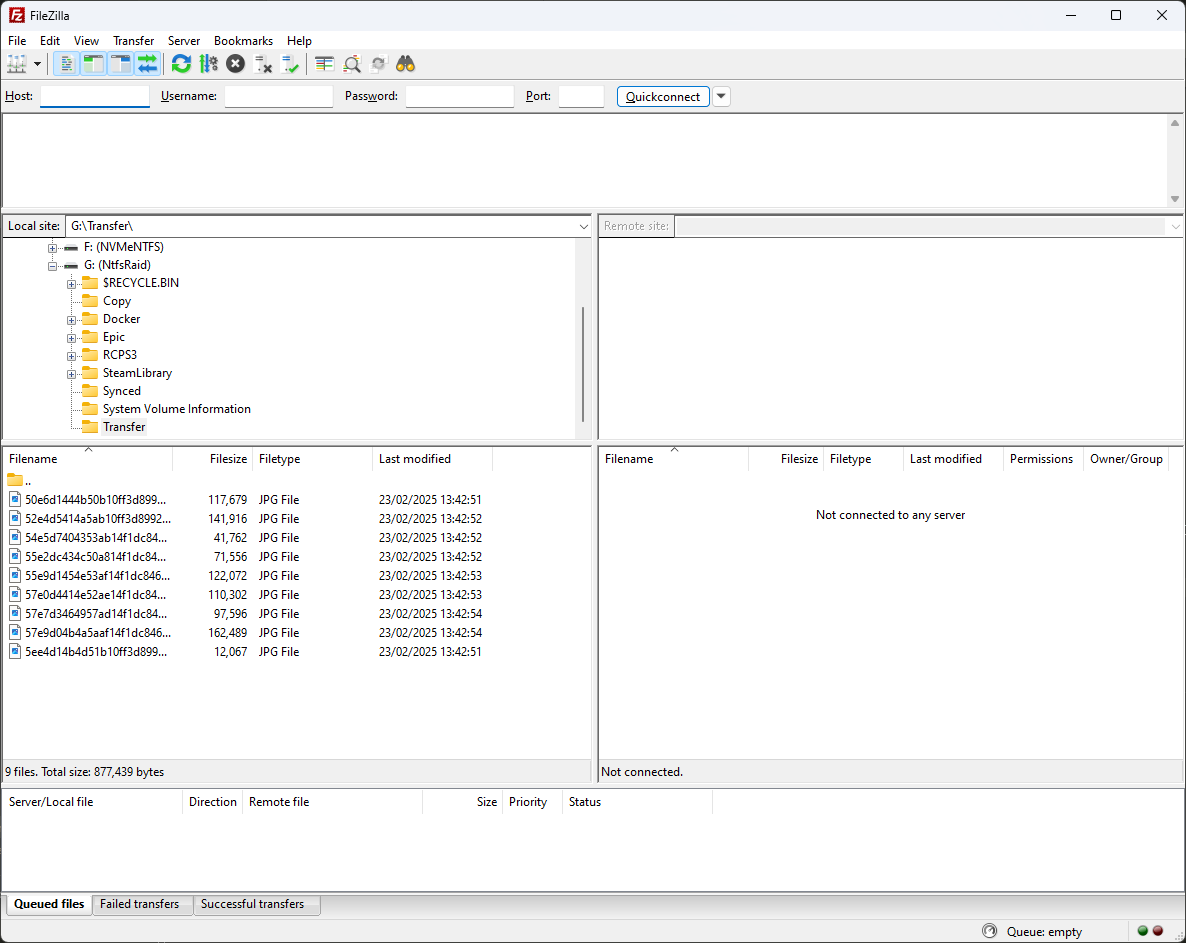
- The screen is split in the half, at the left is your computer and local files, the right will be the server, as you can see in the left side I’m in “G:\Transfer\” and there are some image files there, I will upload these to the server as an example
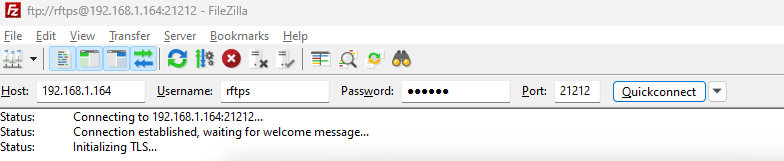
- First we need to connect to the server, at the top input the data
RFTPSgives you:- Host: Host
- Port: Port
- Username: Username
- Password: Password
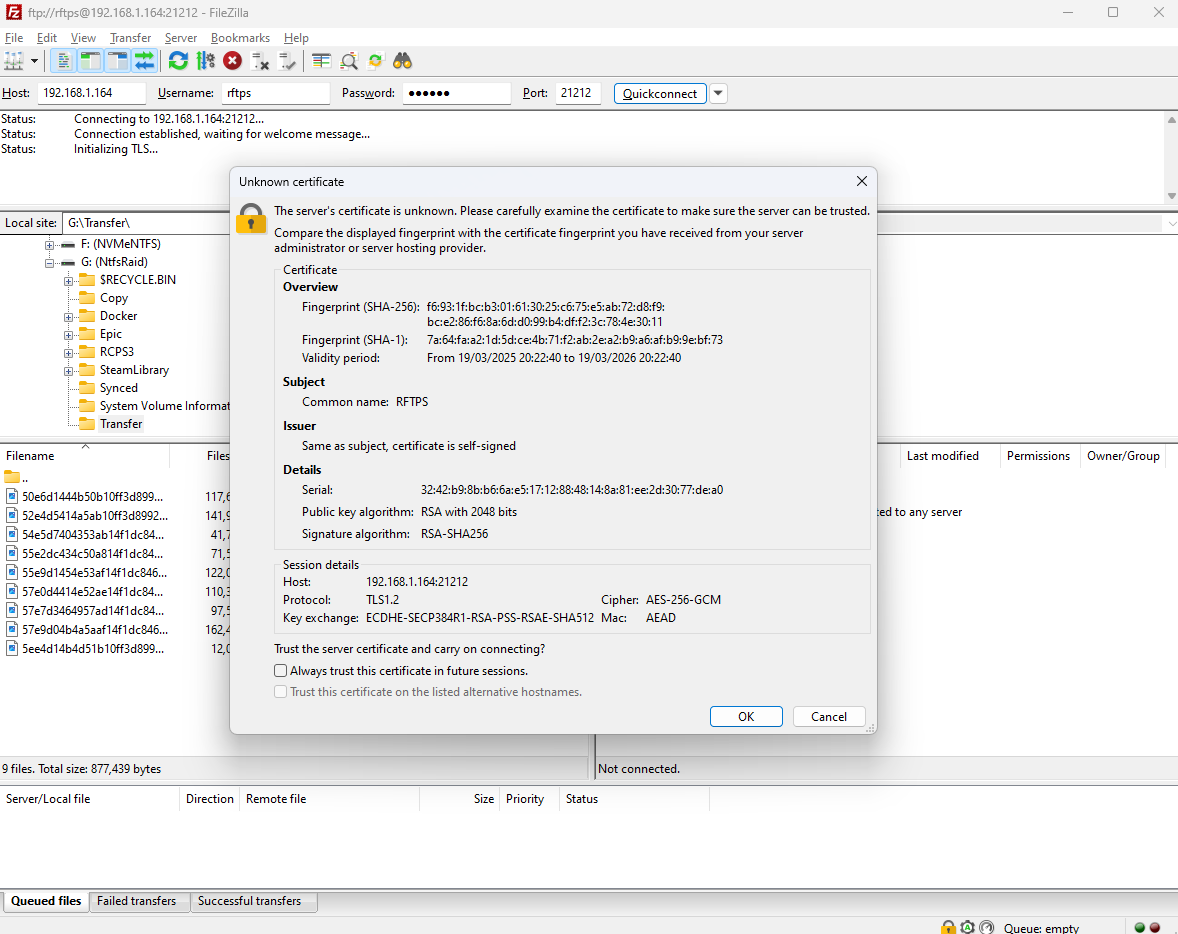
- When you click “Quickconnect” it will tell you it’s an unkown certificate(like I mentioned previosuly, code certificates are expensive), you will need to accept it.
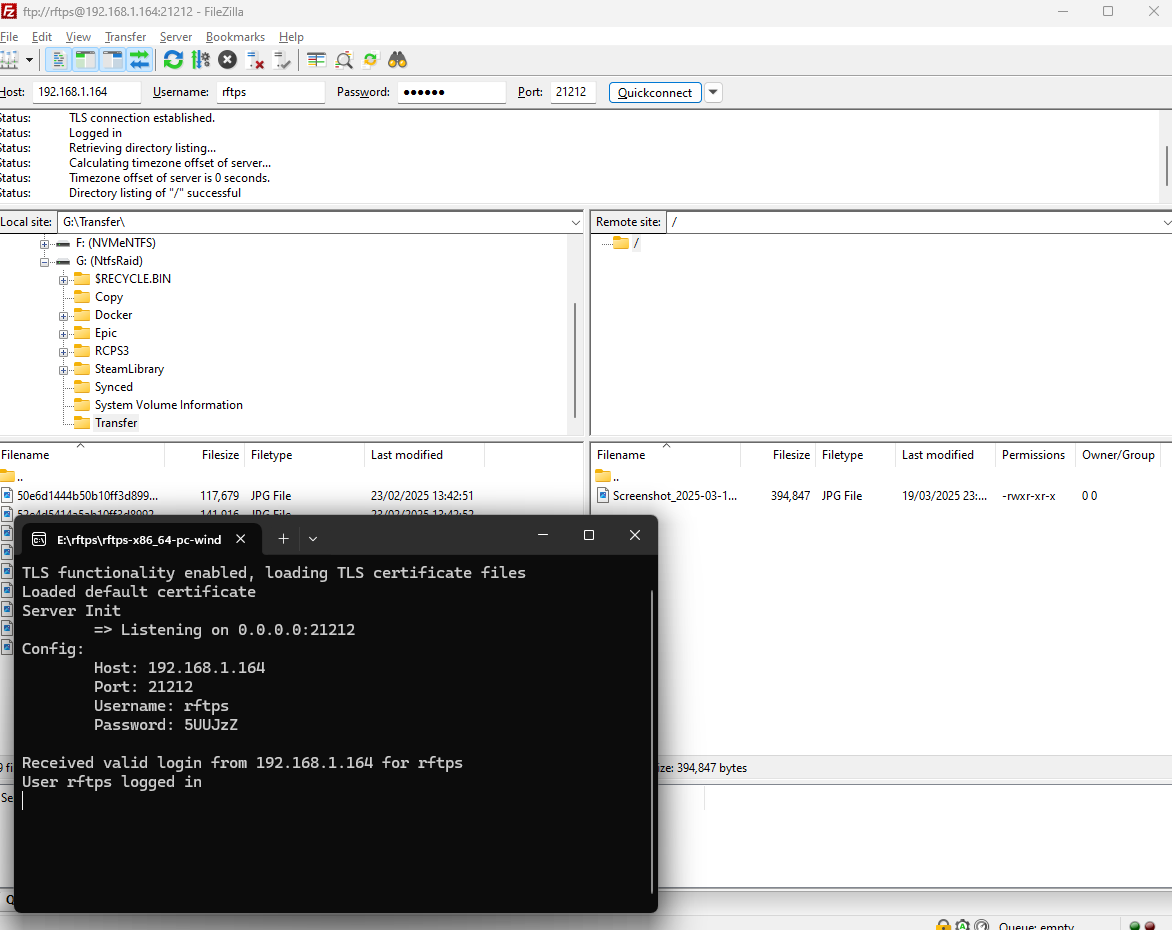
- After that you should see your server on the left side:
- Now you can select you files on the left and double-click or right-click and the upload them
- You should now have the files on the server:
End
If you have any issues with RFTPS itself feel free to submit them on github and if you experience any issues you can reach out to me trough my socials 😄